
Boxed Sets and Single Card available for the first time | HERE

Made in Sweden | Flying world wide | HERE
Balloon Ice Lanterns and Ice Art
Make these magical ICE LANTERNS
step by step tutorial below.
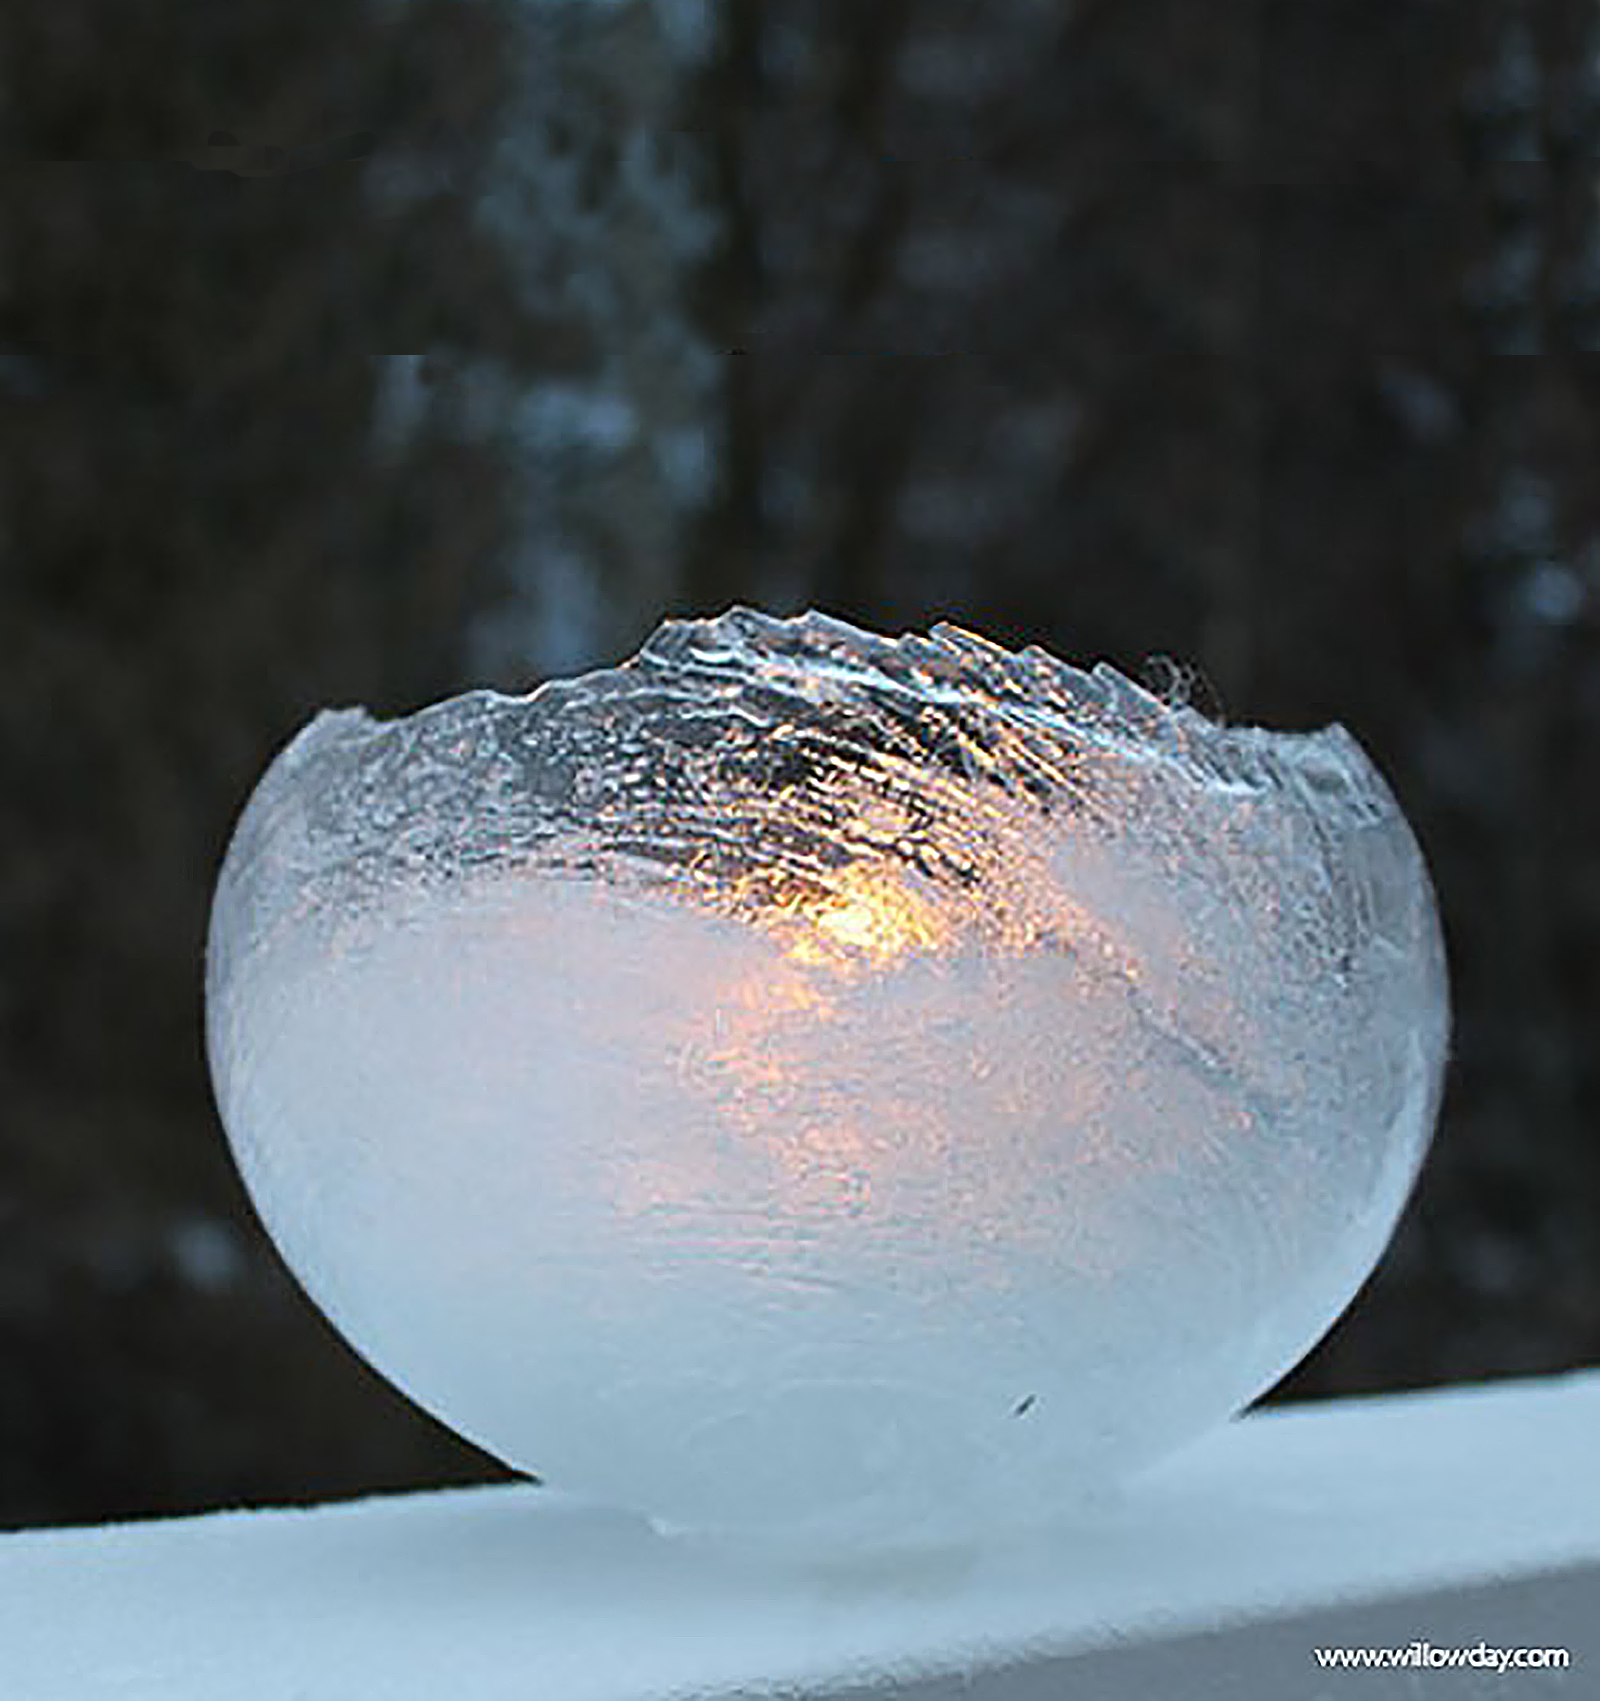
Ice Lanterns
The cold has hit Stockholm. Neighbors have been filing by our house all day, pulling one or two sleds and with their ice skates slung over their shoulders; ready to hit our neighborhood rink and hill. I would love to share a super, cool, ice art project my son came up with this week. Tonight, imagine: these lit up our walkway! You can, too.
See below for the How-to.
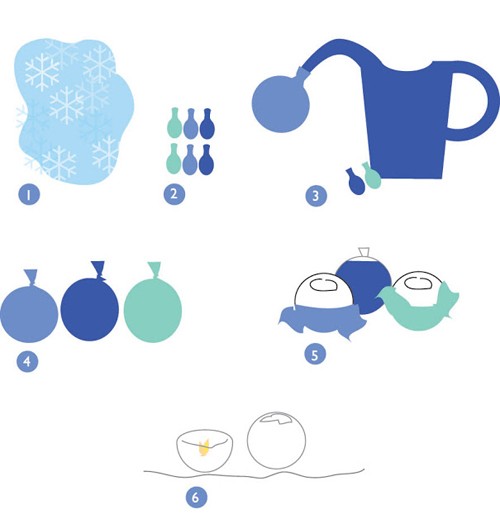
ICE LANTERN MATERIALS
These are idea for the days when you have freezing temperatures. If not, don’t worry. You can make these in the freezer, as well.
- Latex Balloons
- Water faucet or hose
- Tea Light CandlesNote: If you have very young children, adult assistance will be needed for filling and closing the balloons; then, again later, to assure gentle hands for the balloon removal process.
How to
- These work well when all supplies are prepared before starting.
- Carefully slip the lip of the balloon over the faucet or hose head, keep pressure applied to the balloon lip to avoid leaking water and fill balloons until desired size.
- Tie well.
- Place outdoors or in freezer — attentive to how you lay them down, this will affect the final shape.Once frozen to ice lantern stage or ice sculpture stage, clip off the top of the balloon, turn up-side-down and drain water, if making the lantern and peel away the remaining balloon. (In a freezer (-15C–20C/0-5F) a regular sized balloon will freeze to the lantern stage in approximately 4 hours.)
- Place a tea light candle inside the lantern.Light. Enjoy the magic!*
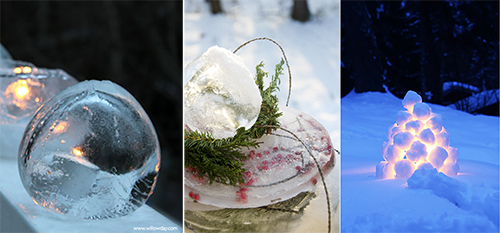
If you have kids, these are wonderful to use as, Balloon Ice Art, too. To to this, simply freeze completely. These frozen sculptures are beautiful mixed in with the Ice Lanterns.
Freezing notes:
- In a kitchen freezer, a small lantern can be created in approximately 4 hours. When the balloons are about 80% frozen, snip the top of the balloon and peel it away. It is critical that one side of the balloon will not yet be frozen and remains open. Drain any remaining water from this open side. By doing this, you will keep it from sealing and will have a perfect form for an ice lantern.
Note to making these with kids:
PSS: Thank you readers for your mails and for your photos. I love to see how you’ve used these and to hear your stories!
MORE ICE PROJECTS:
15 ICE PROJECTS FOR KIDS
Willow Wishes!
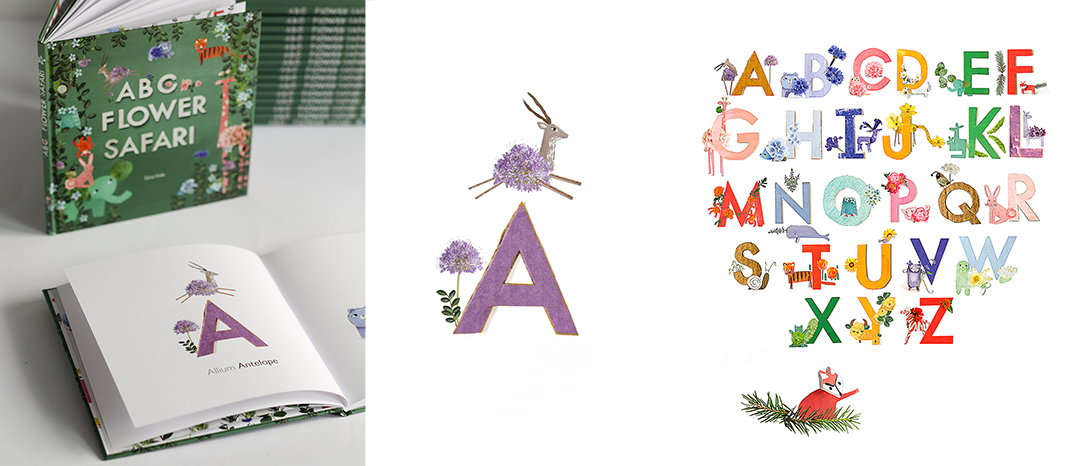
ORDER, ABC Flower Safari
A-Z Flower animal play

CLICK HERE OR ON ABOVE PICTURE TO GET WILLOWDAY STRAIGHT TO YOUR INBOX AND TO RECEIVE A FREE FUN FOODS EBOOK, EXCLUSIVELY FOR SUBSCRIBERS.
Join me on Facebook and Instagram.join willowday on : Instagram | Pinterest | Facebook

