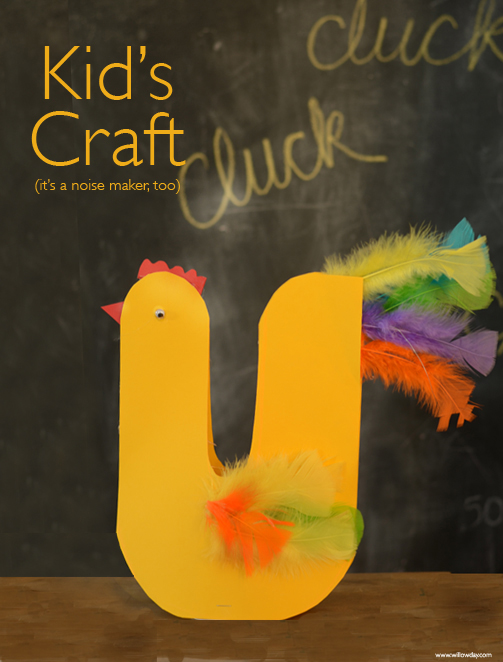
Is Easter sneaking up on you, too? These are the most fun Easter craft — ever.
In Sweden, we have Easter Roosters, rather than Easter Bunnies. Our kids first came home with these funny Rooster decorations when they were in pre-school. This craft is such a hit with pre-schoolers and young kids because of the noise making, it’s simple parts and durability.
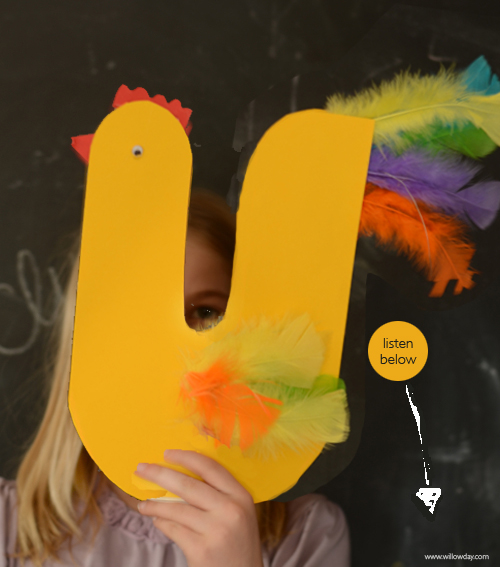
Bring in the day with these Noise-maker Easter Roosters! (listen below)
Click here to listen to the rooster! (refresh the full page to replay). I had early morning help to get our rooster to make his morning wake up cluck!
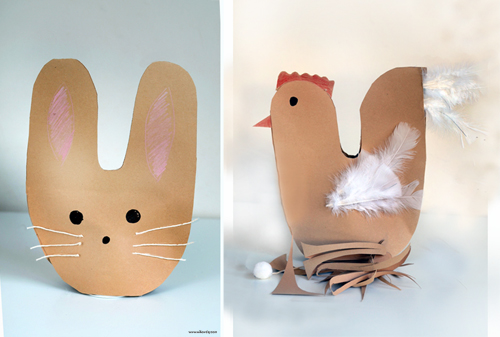
This year we’ve make some in color, some in craft paper and have also used the shape to make a sweet bunny. It’s the same shape except we’ve fully rounded the tops.
Tutorial:
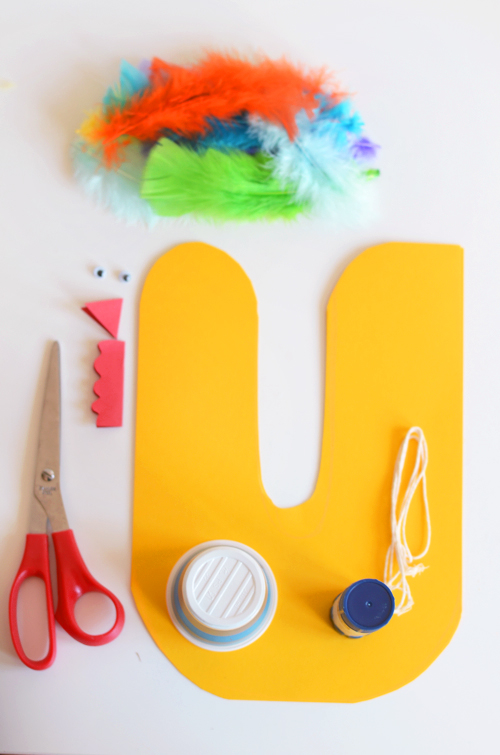
- Supplies:
Craft Feathers
2 Card stock papers: card board or heavy paper that is letter sized or an A4.
Red construction paper
Scissors
Pencil
Google eyes
Kitchen String
Plastic cup — the type shown below give the best sound!
Glue or Glue gun
Stapler
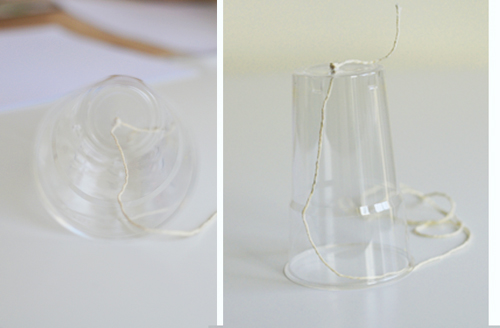
Begin by piercing the top of the plastic cup with your scissors or an Xacto knife. I prefer the sound of the opaque plastic cups shown in the example, shown in blue below and with the supplies; but, to illustrate the process best for your now, I’ve used transparent cups for you so that you can better see how these are tied. Cut an arms length of kitchen string. Knot the string on one end and pull it through the cup. Set aside. This is the clucking noise maker. Testing is fun!
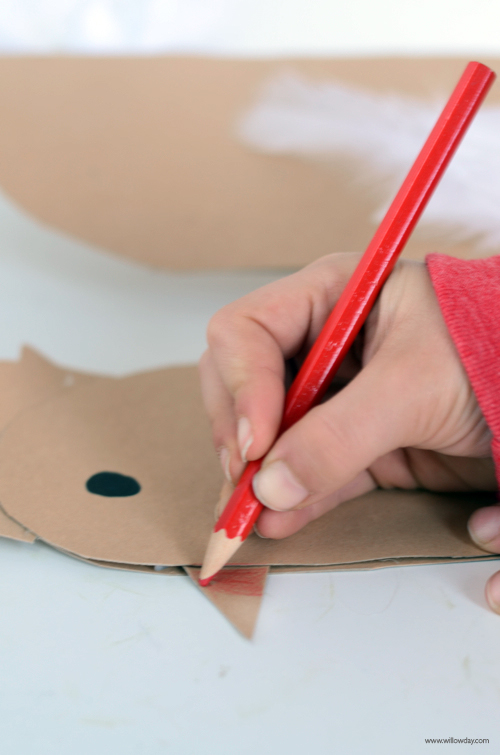
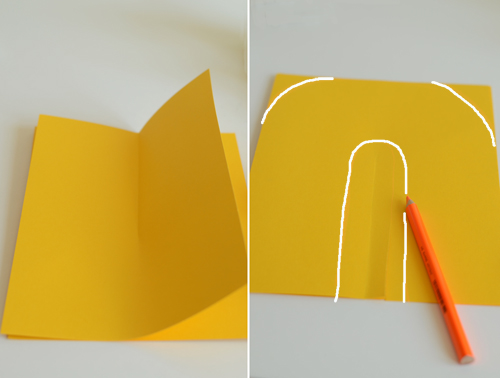
Lay out the 2 sheets of paper. Gently fold to find the middle and make a small crease for a marker. With your marking pencil, (you are basically creating the letter “U” ), note a cutting guide to show the center and where you will round the corners. Cut along these marks. If you’d like to make the bunny, fully round the corners. (see bunny example below) Have the children draw, glue or embellish the front of the rooster as they desire, at this point. If using google eyes, I would wait and apply these as the very last step, once assembled.

Cut beak. Cut comb. Choose feathers. Glue the beak, comb and feathers on to one of the 2 identical rooster shapes you’ve created. Apply glue to the head and tail area of the rooster and place the other identical rooster shape over the top, sealing in the bases of the beak, comb, feathers.
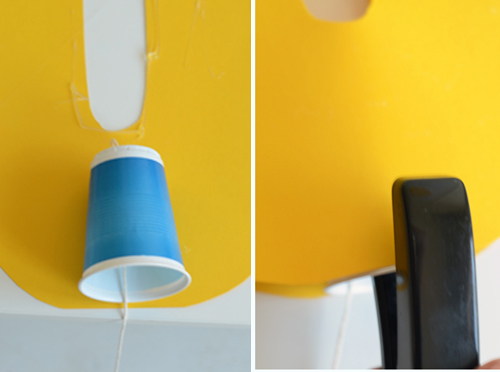
Leave the bottom free from glue until you are ready to place the cup, bottom side down, into the center. Keep the cup level as this will provide the base that the rooster will stand on. Staple the cup in the center, once, on both the front and back to give extra hold.
Let dry and your rooster is ready. To make the rooster cluck, pull the string and it will make the sound. To see this in action, look at the video again. Happy Making!
Did you that Roosters bring Easter Treats in Sweden, not the Easter Bunny? | READ MORE | HERE


CLICK HERE: Never miss a post, tutorial, news, gift and more

