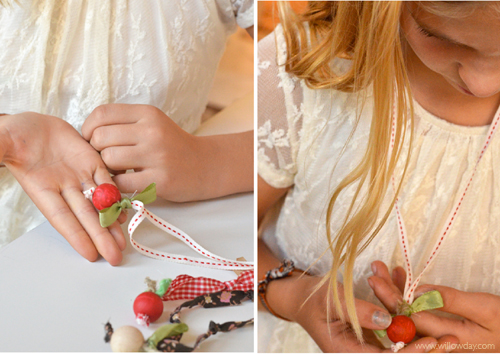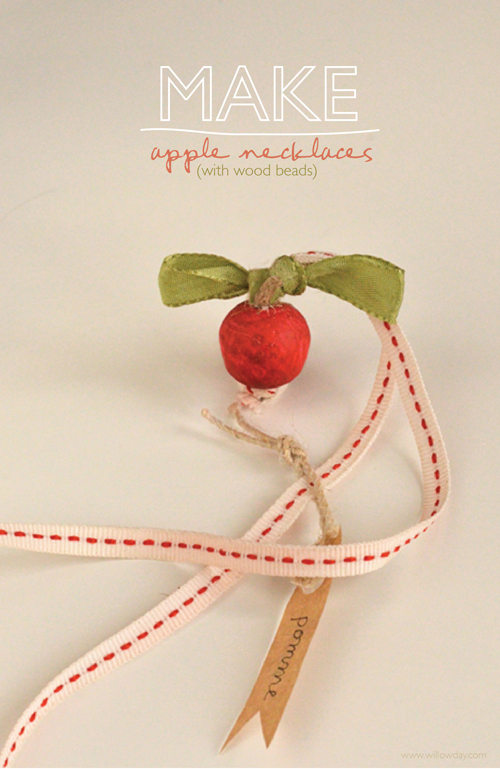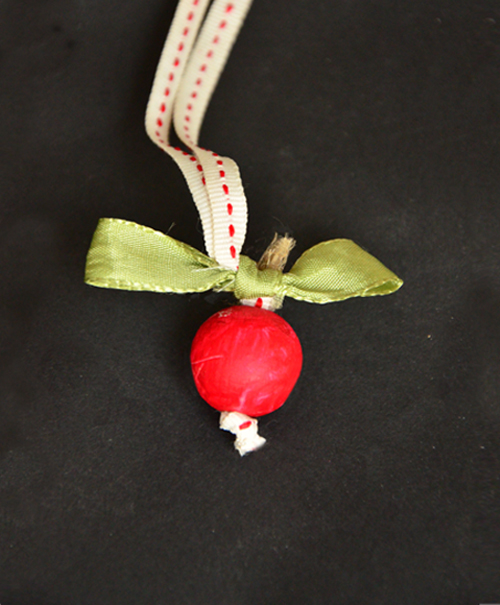
I won’t say that the season is exactly changing; but, I will say that we are starting to spend time our time differently than we’ve done all Summer. One of the ways that I’m seeing change is that I’m noticing lot of lots of projects showing up in our house again. Are you the same? Are you looking for something to make with your kids or for them — or as a gift? We think today’s Apple Necklaces are as sweet as the real thing and hope you will, too.


Just click on “read more” below for more photos and the full tutorial. As always, I love to see what you do with the tutorial. Now that I’m on Instagram, I’m learning that that an easy place to share what you make but, I love to hear from you in any way. Have fun and Happy Willowday!

Paint the beads Granny Smith Green, Delicious Red or leave them plain with bright colored ribbon. I love using ribbon with any apple-y prints, gingham or Liberty patterned fabrics with these little pendants. I’m always picking up ribbon when I travel. When putting these together, I thought of the liberty patterned ribbon bracelets have been popular there. You could easily slip knot the ribbon to make a bracelet and turn these into similar bracelets, if you’d prefer. Our daughter decided to go a round 2 and keep one like that for herself, after making these originals to mail away.


I think the green leaves create enough of a feeling of an apple that you don’t have to necessarily work so hard and file down bead. I like these apple necklaces as beads that just happen to look like apples, too. But, if you’re an apple-perfectionist — sand, sand, sand away —- the results from sanding the edges to make the apple shape are really cute and worth the efforts. I used a sponge course sand pad because I thought this was easiest to grip. If you have special metal sanding tools, go ahead and use these but, I just picked this up at our local paint shop.
Supplies:
– Paint (Hobby Paint for Wood)
– Paint Brush
– Ribbon for Necklace
– Wooden Bead (We used 1/2″)
– Silk Green Ribbon or Green Felt
– Hobby Glue
– Heavy twine or thin piece of jute
– Needle and green thread
– 2 Wooden Skewers or another thin object for threading the bead
– Optional: Course Sand Paper
1. Prepare working surface.
2. Beads can be 1. painted apple colors, as desired or 2. you can take it one step further by sanding facets into the sides of the apples to sheer off the edge to create more of an oval, apple shape. To re-shape the apple, sand the bottom 2/3’s of the apple all of the way around the apple to make the bead look more like an apple shape. Once you’ve shaped the apple, dust it off before proceeding to painting.


3. Once the beads are dry, measure desired length of necklace for the wearer and add 6 inches of length to the ribbon. Cut ribbon. Cut 1/2″ jute. Cut 8″ piece of the green ribbon (or cut double layered piece of felt and sew together. This example is the red apple on the red gingham ribbon)
4. Fold the ribbon in 1/2 and insert the folded end into and through the hole in the bead. Once this folded end is through the hole, tie a tight knot close to the hole. Now, knot the ribbon about every 4-6 inches regularly.


Would you like to add simple, everyday, creativity to your family — or travel with us to Sweden — just sign up here and never miss a post.


