
I’ve been in love with the idea of designing fabric for a long time. This past week, the kids and I did just that — we painted fabric and up-cycled, too! Click below to see more and learn how you can do this, too!

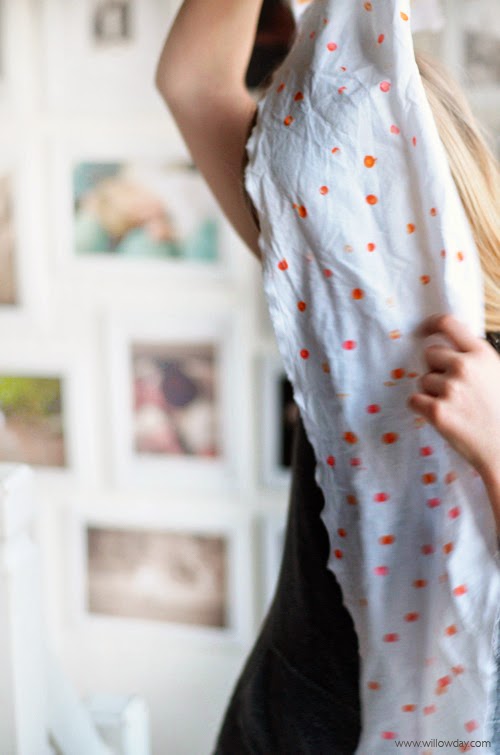
Gather up your crayons and design fabric with us, today! I just love a project that is both functional and fun; the process is full of experimentation! With the fabric we made, we were able to turn pieces into pillows, a bags and and a scarf in our one session — none looked the same. The vivid colors make beautiful art almost fail-proof. With adult supervision, this is a project for all ages and all skills.
Do you have stashes of broken crayons or like, us, have crayons that are gathering dust and filling drawer space? I’ve been saving those colorful nubs for a rainy day and today, I’ll share how we colored

How to Color Fabric with Crayons:
Prep:-Wash fabric without fabric softener. Dry.
– Prep work surface and cover the area that you will be using to paint, either aluminum foil, butcher paper or baking paper to avoid stains from the crayons.
– Lay fabric flat on this covered surface and set out supplies — erasers (for polka dots) and/or brushes.
How to Melt Crayons (Oven + Microwave)Organize crayons by color, them, melt in oven or microwave:
Oven:– Heat oven to 275ºF/140ºC.
– Fill the cupcake tins (tin or silicon) with crayons organized by color.
– Place in oven until melted. This will take about 10 minutes.
– Remove from oven and use immediately.
– Place approximately an inch (3 cm) of water in a microwave proof tray that is large enough to hold the smaller containers.
– Rest each container filled with crayon stubs in this dish or tray. Make sure the water doesn’t leak into the containers holding the crayons. Water is needed to provide the necessary moisture for microwaving the crayons.
– Place the tray or dish and containers into the microwave oven.
– Microwave the crayons in bursts of 30 seconds, on high. After each burst, check to see how much the crayons have melted. They should be ready to use after about three to four bursts.
(How to clean: allow the crayon to fully melt and then, nudge the solid crayon from the container surface with a dull knife, for example. The remaining crayon should pop out in one solid. Wash with soap and water.)
Once the patterns and artwork has been created. Let dry and once dry, move to the ironing board, with a cotton rag under the fabric, place the fabric on top of the rag, on top of the ironing board. Cover your artwork with paper towel and then, top with one more cotton rag. This is important to absorb the extra color and wax as it can seep through the fabric.
Once the surface is prepared and iron is heated to “cotton,” it is time to iron the painted fabric. Carefully iron the full surface that has been painted. Ironing sets the artwork and it is important that every inch of the crayon is heated. Once the full surface has been ironed to set the artwork, let cool.

Happy Making! We can’t wait to see what you do with this tutorial. Happy Willowday Making!


Melted Crayon Art with a Glue Gun by Learn Play Imagine
Art for Kids Using Sandpaper and Crayons by Buggy and Buddy
Crayon Transfer Technique by Tiny Rotten Peanuts
Crayon Resist Photo Display by Twodaloo
Melted Crayon Art for Easter by Blog Me Mom
More Fish + Butterfly ProjectsEmbroidered Children’s Art
Card Pen Cases
Easy Pocket Necklaces


