I think everyone truly likes to leave a personal touch in the world around them. With kids, it feels extra important . I’ll show you the Personalized Kids Art I’ve made with my kids so that you, too, can make your own: Personalized Kids Art
Let’s go: Time to find a way for you, too, to make your own Personalized Kids Art.

These were ways that we created Personalized Kids Art in our home. This is one that make my heart go boom and the kids feel super proud. We took my son’s favorite stuffed animal, styled and photographed it and then, framed it as bedroom art.
This is an “everyone can” project. Whether you are looking for a personal way to decorate a children’s room or maybe planning a gift for someone special. Take portraits of cherished stuffed animals, enlarge the photos, frame and decorate kid’s spaces with personalized kids’ art — art, tailor-made for each child, with a twist and a tale.

Continue below for more photos and how-to…
It doesn’t matter if the toy is a plush toy or a hard, classic, toy like the bunny. They both work. For Gray, our son, I loved the rock star quality of the stuffed lion portrait and then, for a baby, the modernity of the miniature, classic, white bunny, oversized as a print.

Some additional suggestions I’ve found that made this project all the more special:
- Write something about each poser on the back of their frames.
- Have your child sign their name, too. One day, this will be such a memento.
Examples:
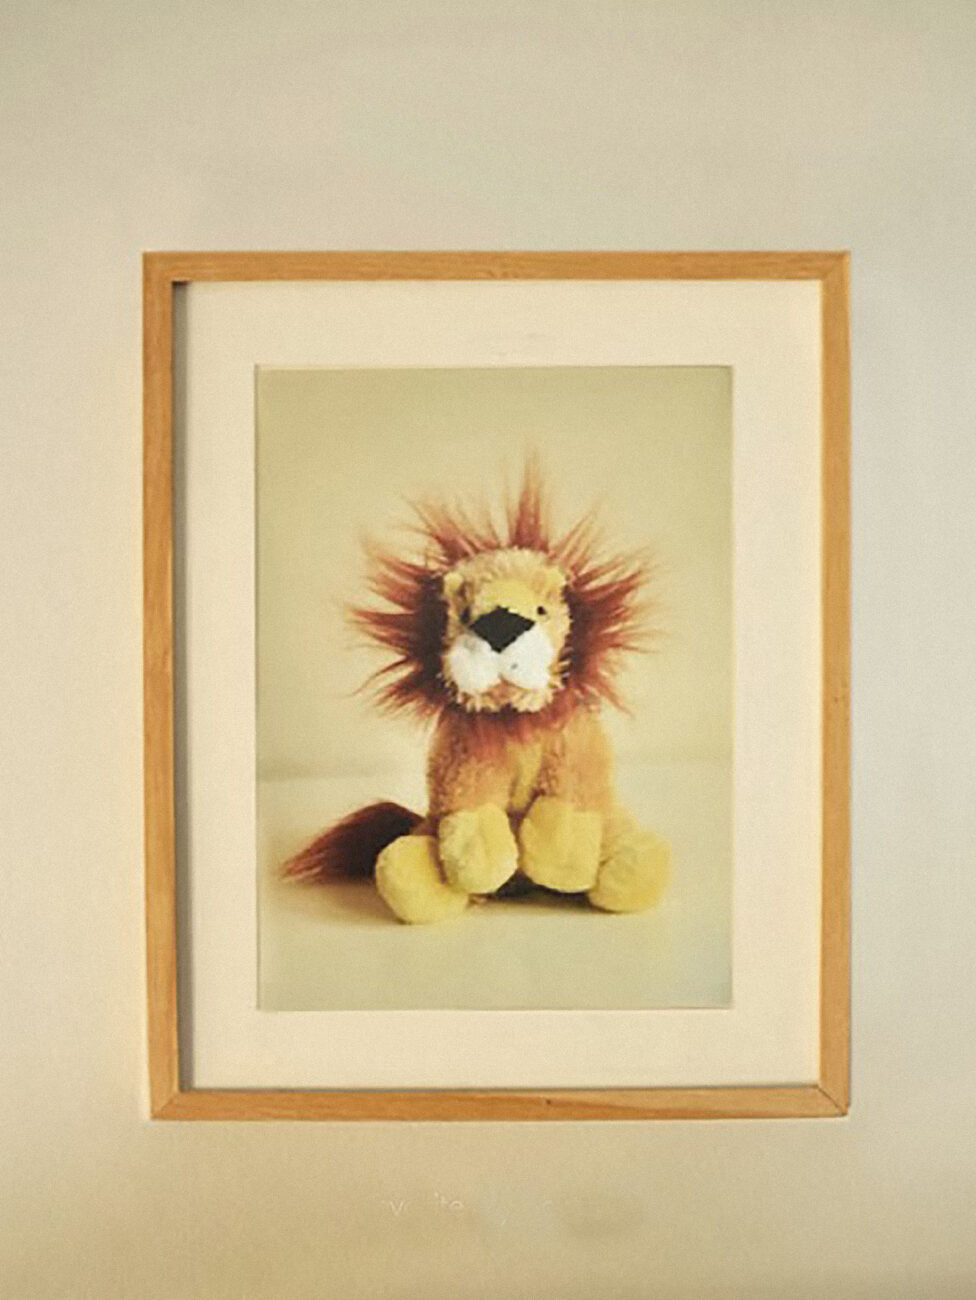
1. “Liony” — a personalized portrait of our youngest’s favorite stuffed animal.
2. The bunny is baby gift for a friend.
3. Carmel, the Dog. In another Personalized Artwork that we made, we used this above pop, Carmel — in the red sweater. Carmel belongs to our oldest son and was a gift to him on his first airplane ride. Carmel is now a card-carrying-frequent flyer (and napper.) The sweater was one that I knitted to his specifications, the winter I was expecting and knitting for baby number two. Recorded as a print, Carmel is “around” even though he not in active play these days. He’s a time capsule. Carmel’s print, in contrast to his younger brother’s, is a wallet print in a teeny frame. Carmel’s portrait is included in an expansive, collection of old and new extended family black and white photos and I love the surprise of finding him there.
This is what you’ll need.
- Favorite Stuffed animal or toy
- camera
- solid colored surface
- frame
How to:
- 1. Prep: Groom toy. To prep Liony, we wanted to keep his wild personality, but felt that a little comb out before his big portrait, would be helpful. We wanted his mane to look grand and paid extra attention to his eyes — brushing the plush away from them so that they would photograph at their finest; fluffing and squaring ears, squeezing and re-distributing fluffy bodies to look as even and balanced, as possible.
- 2. Prop. Pose. Prop and pose toy on a clean, open, surface into a sitting pose. We tried this a few ways and I found that my personal favorite gave a “portrait” quality when we propped the animals looking straight-on at the camera (shoulders square or just slightly tilted). I love a clean white background, so we used a white table that has a white wall as the backdrop behind it. I also prefer natural light and took his photo at mid day with natural light streaming in the window but, not shining directly on him. A note: if your stuffed animal is very dark or black, pay attention to the eyes which can get lost in a photo. Make sure the fur is pulled back. If you’re doing this with your young assistant, you can ask them to hold a piece of white paper up to reflect light back to catch the light in their eyes.
- 3. Photograph: Shoot. When taking a portrait, leave plenty of white space around your stuffed animal and shoot from low. Hold the camera very still or use a tripod, if you have one available. I think our best portraits were taken when the shot was taken “head” on and on the same level.
- 4. Develop. Choose photo and develop. You determine the size. I considered making over-sized wall paper with these stuffed animal portraits but, found that a poster-sized portrait + minis were right for our house. I wish you inspiration! I’d just love, love, love to see how you use this tutorial.Happy making! Happy Willowday!

Something you might like:
Pet Portraits | Cupcake Tin Art | Make a Wild Weaving | Paper Fan Garland | Make Spray Paint Tees | Framed Flower Monogram
Pet Portraits | Cupcake Tin Art | Make a Wild Weaving | Paper Fan Garland | Make Spray Paint Tees | Framed Flower Monogram