Mothers know best —- Mother Nature and my own. A few years ago, my Mom shared how to dye eggs naturally as an idea for me to do with the kids. She’s smart that way — full of great ideas that really work and that are a lot of fun.

She’s such a social doer — an ultra organized, make-things-happen kind of Mom that it’s hard to imagine that she ever sits down with a minute to spare to push her sleeves up and gets artsy, but she does and when she does the projects are always fantastic. And of course, she knew that sometimes you just can’t beat Mother Nature. I think these colors are so vibrant, full of depth — exquisite.
Taking her advise, we began with cabbage, moved to beets, onion skins and more. We felt like scientists and now (if we’re not coloring eggs: this + this), we’re dying eggs in oodles of colors naturally and want to share with you, today! Happy Monday Making! ( and thanks, Mom!)
Click below for full tutorial below…


I’m always on the look out for how ways to use nature and bringing it home. What I love most about using all edible materials is that dyeing eggs becomes a totally safe and healthy activity. Afterwards, these beauties can be eaten. I feel like I say this a lot but, I love creative projects as a great time of relax, experiement and share together. Coloring eggs is just such a perfect way to talk about natural dyes and to engage children in the ways we can use plants: colors, food, medicine, and more.
We used large Mason jars and found that the longer the eggs sat, the deep the colors will be. Beets, tumeric, tea and blueberries are quite fast to work with. Others, like the cabbage and the onion skins need to sit over night for optimal color. I’ll also share that I had the ingredients ready for use. We often make one or two colors per day, rather than everything at once because of the extra step of preparation of the dyes. If you would like to do these in one sitting, I would suggest preparing the dyes ahead of time and dying in a second sittings.
Let’s Make:

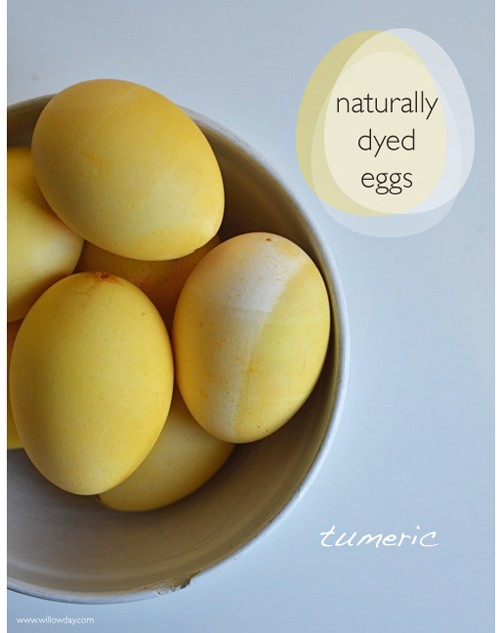
Turmeric is so easy. I’ve gone nuts for this one and I will actually share more that we’ve done soon. The color from Tumeric is not only beautiful, it’s incredibly easy. Boil or heat water almost to boiling and then, add the tumeric. To get the results that you can see above, I used about 2 cups water and 4 T tumeric. If you would like pale yellow eggs, you can just dip for 1 minute or two. If you let these sit for a while (approximately up to an hour), you can achieve very intense shade.
Purple Cabbage (here, too)
1 head Red Cabbage, shred, 1 T. Vinegar, 3 C. Water. Shred one head of red cabbage. Set cabbage in pan to boil. Cover cabbage with water (add more if necessary). Cover the pot and boil for 45 minutes to one hour. Remove pot from the heat and strain the cabbage out of the mixture. Add vinegar to this strained dye bath and let cool. Once cool, add eggs. For more intense color, leave in the cooled dye bath longer.
TIP: Since we wanted to have hollowed eggs, they floated. In order to get better coverage, we set the eggs in a mason jar and poured the dye bath over the eggs, covering them completely. If any eggs were floating, we’d turn the mason jar upside down in order to cover all eggs evenly. To reach the above color, we bathed the eggs overnight.
TIP. If you mix Cabbage and Turmeric, you’ll get a beautiful shade of teal.
Onion Skins
Onion skins make deep, beautiful tones — rich reds which you can see in the photo of our daughter. Dying with onions are so easy that you can boil the onion skins at the same time you boil eggs.
Gather large handfuls of onion skins. Put your uncooked eggs in the pot with the onion skins and allow to boil together for about 25 minutes.
Tip: Since onion dyes are so easy to work with, you might like to try a little variation. To make eggs that have warm nuances of reds and red yellows, wrap an onion skin and/or a leaf and place an egg on top. Wrap the egg, leaf and onion skin in cheese cloth and secure with a piece of string. Place in pot and boil. This will give the eggs another intensity and if you add a leaf (we have experimented with ferns or even blades of grass) you will create a pattern. Onion offer endless experimentation! Just a note, if you are making patterns, it is important that that you don’t skip the cheese cloth and string in order to get a clear pattern.
BeetsI’ve been adding these to our daily juice all winter making these the first dye we made this year. Use 2 bunches of beets and chop them. Boil for about 30 minutes until liquid is reduced and a deep color of fuschia. Remove from heat and into a glass or metal bowl, add 1 tablespoon of white vinegar. You’re now ready for dying.
Blueberries:
For anyone with small kids who eat blueberries, this will come as no surprise, but, blueberries make one of the strongest colors. I used about 1 cup of blueberries and simmered them down with water for about 35 minutes for a dye that you can use as is. No vinegar is required.
Hibiscus Tea (I’ve wanted to try this ever since I made these flower tea bags)
Brew a very strong tea and then, use as dip.
Variations.
I love dipping and overlapping eggs. Wrapping eggs with rubber bands or washi tape, then dipping are a great way to achieve beautiful patterns. As well as drawing with light colored or “white” crayons.
However you use this tutorial, I hope you have fun and I would love to see what you do with it!
Other Eggs:
Natural Eggs for Swedish Easter Bouquet

Other natural ideas: (not pictured)
Bunny Cupcakes (with natural color)

MY ART PRINT SHOP ( HERE)
Have a wonderful weekend! Remember that I love to see your work. Don’t be shy. Share it with me on Instagram or Pinterest | Facebook.
Join willowday on : Instagram | Pinterest | Facebook
 Get all willowday posts directly to your in box and receive a FUN, FREE, KIDS ebook COOKBOOK | HERE


