Whether you have real snow or imagined, hop with us below to add a little snow to your tables this weekend, too!


Tip: Base the size of your snow flakes on the size of your dinner plates.
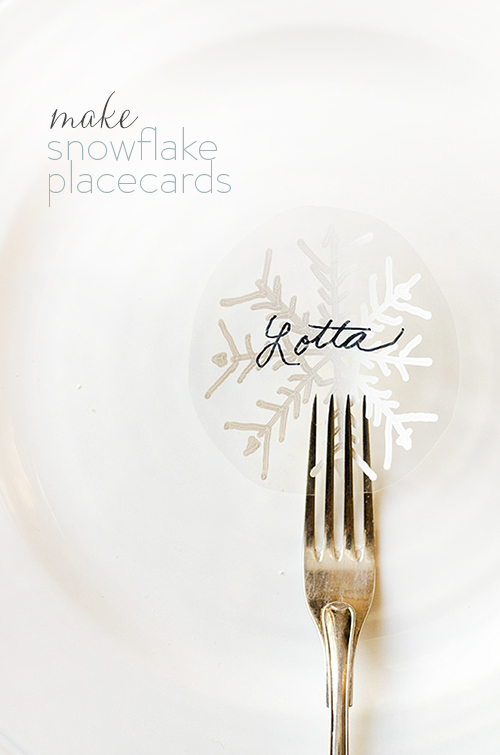
‘For example, the dinner plates that I’m using are quite large (26 cm) so my snowflakes are approximately 5 cm wide and this is how you make them. I made 9 snowflakes on 1 sheet of OH paper.
To do this, cut around the edge of the snow flake. You may choose to follow the curves of the pattern or cut a circle, like I’m sharing her.
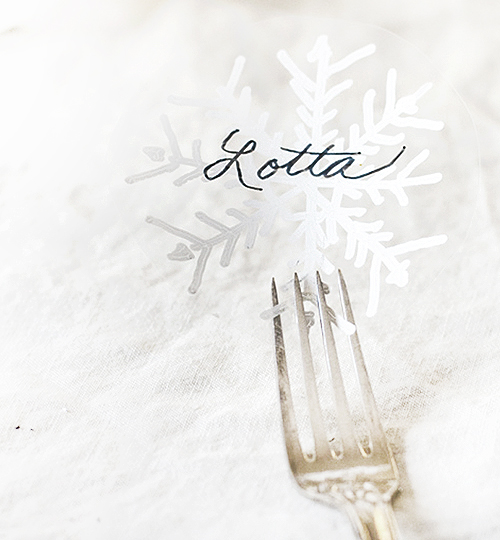
Once the snowflake is complete, draw names onto the snowflakes.
I felt the writing the name of the opposite side of the white chalk drawing worked best. By using this method, there was no smearing.

4. SET the Table with these new Snowflake Place Tags.
Note: These are re-usable! Since you’re using chalk markers, chalk can be erased after serving dinner and re-used again and again. If you write the name of the backside of the place tag, then all you’ll have to do is re-write the name.


Whether you have snow or can only make your own, we send our wishes to you for a warm, cosy weekend!
We haven’t talked New Year Resolutions but, one of mine is more entertaining at home in 2016; however, I need this to be simple. I love home with open doors but, this in the past year, I feel like I haven’t been as well organized on this front as I like to be and it’s high on my list for making a great 2016. What about you? Do you make resolutions? I’m curious, do you have one top trick that makes simple entertaining easier and more fun? We’re a household that appreciates both food, people and details but, one of my husband’s (unspoken) wishes for 2016 was easy, make-ahead, meals — aka: very, little, clean-up and I’ve been trying out a lot if ideas on the family. Is this something on your mind, too?